


MODEL TH101A
INSTALLATION
This thermostat has been designed to operate with any installation which has
a resistive load (not exceeding 4000W / 240Vac or 2000W / 120Vac) such as
electric baseboards, radiant ceilings and floors, electric convectors, etc. IT IS
NOT COMPATIBLE WITH A LOW VOLTAGE CONTROLLER USED BY A
CENTRAL HEATING SYSTEM.
Electricians or experienced technicians should install the thermostat.
This thermostat is designed to be used with a self-protected heating system
equiped with a circuit breaker.
If you have any questions concerning the installation or programming of the
thermostat, please call our technical assistance at (514) 358-4600 for
Montreal area or 1-800-831-AUBE for outside area, between 8:30 AM and 5:00
PM, Monday to Friday, Montreal eastern time, Canada.
TURN OFF POWER TO HEATING SYSTEM AT THE MAIN POWER PANEL
TO AVOID ELECTRICAL SHOCK. Keep air vents of thermostat clean and
free from obstructions.
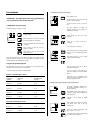
1) What kind of heating system do you have ?
The thermostat has been
factory set to proportio-
nally control electric base-
boards, radiant systems
and convectors. Since
proportionnal control uses
a fast commutation rate
(120/min) it is not
compatible with fan
equipped systems.
You can change the
control mode to make it
compatible with fan
equipped convectors. In
that case, slide switch #1
(SW1) located on the
back of the thermostat at
position « ON », than
press on the « reset » button by using a fine probe.
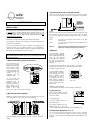
2) Mounting thermostat wallplate
Wallplate is used when the thermostat is to be mounted close to a door frame
or any other obstacle. It is also useful to level the thermostat.
Secure the wallplate to the electrical box using 6-32, 1/2" screws. See above
drawing.
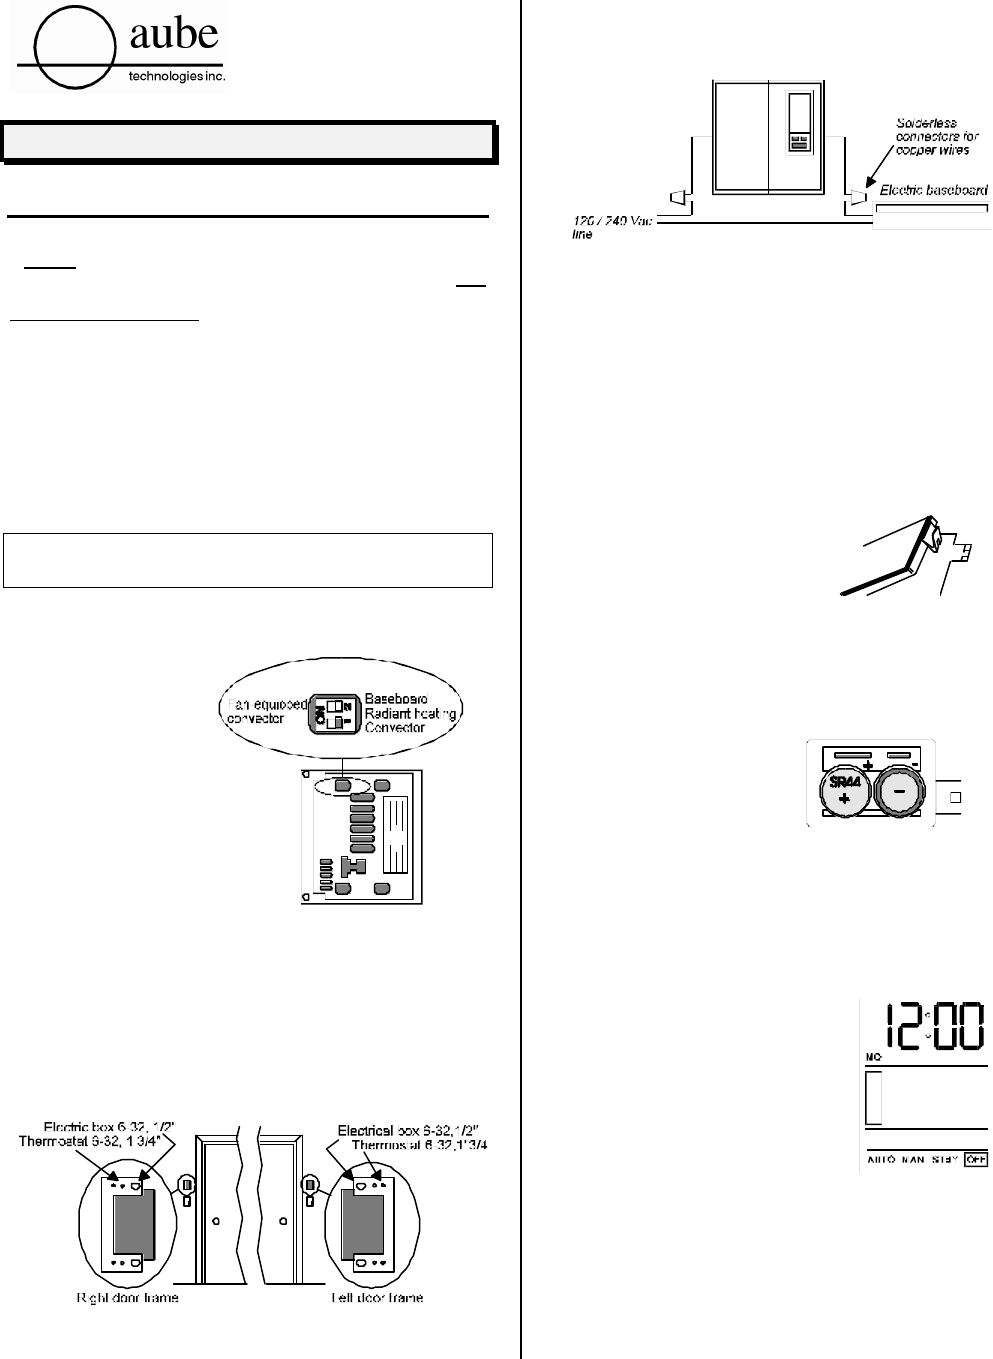
3) Connecting wires and mounting thermostat
Connect the rear thermostat wires to the power supply and to the electric
heater wires using solderless connectors for copper wires. See schematic
diagram.
Push the excess wire back into the electrical box to prevent interference with
the thermostat. Fix the thermostat using two (2) 6-32 screws 1 3/4 inches
long. Once the thermostat is properly installed, return power to heating
system.
Note 1: All cables and connections must conform to the local
electrical code.
Note 2: In normal use, the thermostat's housing temperature can
reach 35 to 45 °C.
Warning : Special service CO/ALR solderless connectors must be
used when connecting with aluminium controlers.
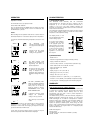
4) Batteries
Your thermostat is provided
with two (2) back-up batteries.
Those batteries will protect the
clock and your programs
against power failure. Batteries
are used only during power
failure and provide 500 hrs of
protection.
To install the back-up batteries, press the latch on the battery
compartment and lift off the cover. Insert the batteries and respect
the polarity. Replace the cover.
To check batteries condition,
press BATT key. The display
must show BATT OK. If LO
BATT is displayed, change
the batteries. If you have a
new thermostat and the LO
BATT indicator is displayed,
check the batteries polarity or
stretch out the contact on the
battery cover.
WARNING : Never let children
play with batteries. Swallowing a button cell battery could be fatal.
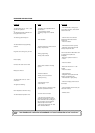
5) First power-up
When power is applied for the first
time, the display must show the day
and hour as follows:
12:00 MO (Monday)
The active operation mode is the
framed OFF mode.
If the display is different, press the
RESET button. Use a fine probe
such as a straightened paper clip to gently push the RESET button.
6) Temperature displayed in °C or °F.
You can choose to display the temperature in Celsius (°C) or in Fahrenheit
(°F). Your thermostat has been preset in Celsius. To change the display
setting in °F, press and release the RESET button while the MODE button is
pushed in.
1.5 volt battery type
no 357 or 76