Epson Stylus C86
3/04 Epson Stylus C86 - 1
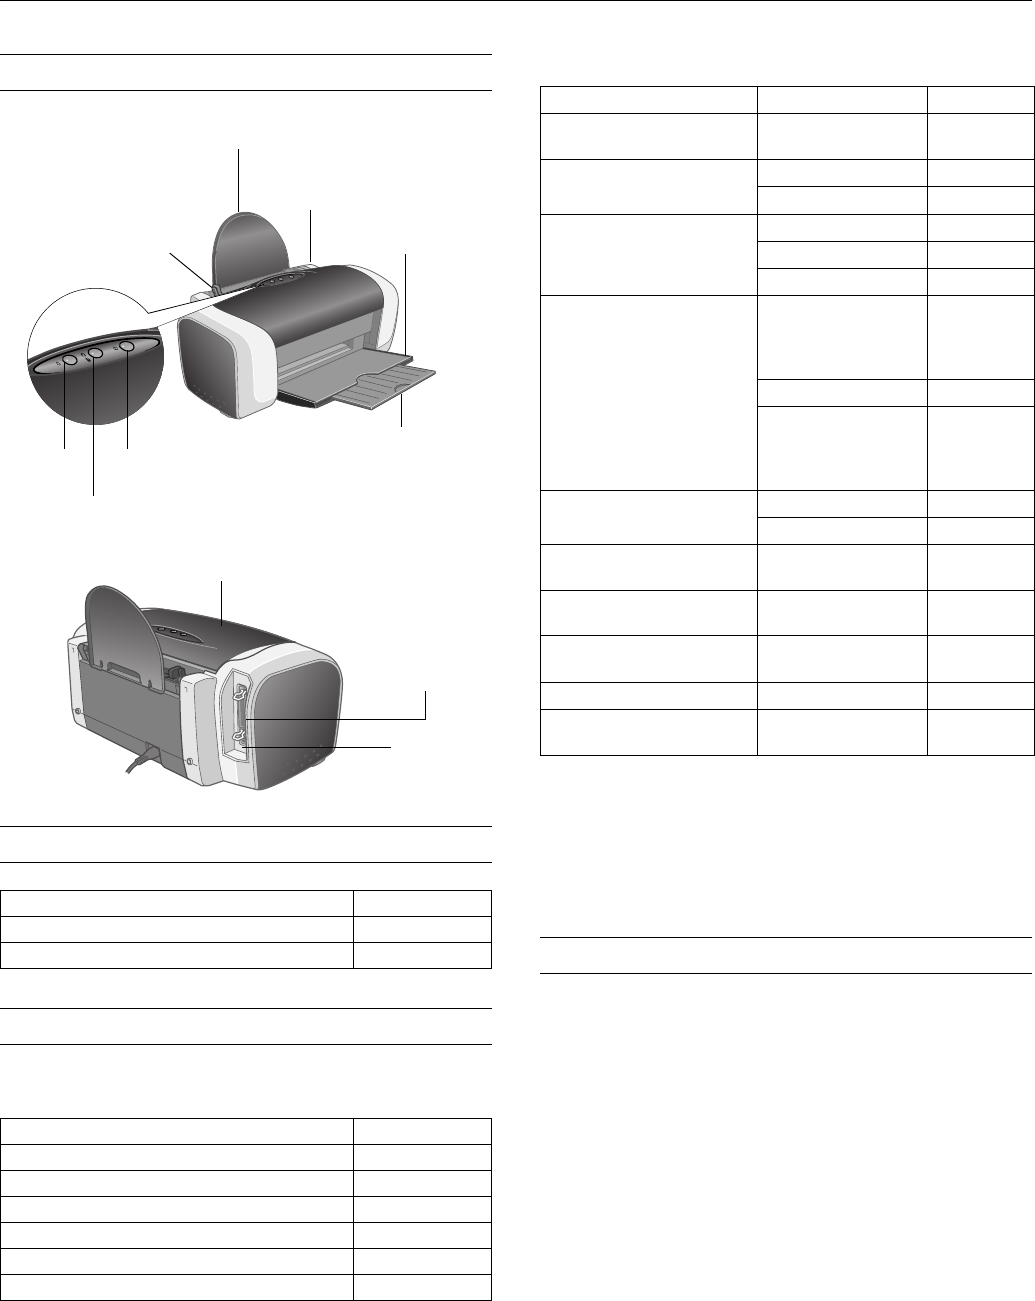
Printer Parts
User Replaceable Parts
Accessories
Ink Cartridges
* Availability of black ink cartridge types varies by location.
Paper
* The availability of paper types and sizes varies by location.
To order Epson ink cartridges, and paper, contact your dealer
or call Epson at (800) 873-7766 or visit the Epson Store at
www.Epsonstore.com (U.S. sales only). In Canada, please call
(800) 463-7766 for dealer referral.
Printer Specifications
Printing
Printing method On-demand ink jet
Nozzle configuration
Black 180 nozzles
Color 177 nozzles (59 each: cyan, magenta,
yellow)
Print direction Bidirectional with logic seeking
Part Part number
Paper support 1262104
Power cord 2068927
Cartridge Part number
Black (high capacity)* T043120
Black (standard capacity)* T044120
Cyan T044220
Magenta T044320
Yellow T044420
Color multipack (cyan, magenta, and yellow) T044520
Left edge guide
Right edge guide
Paper support
Printer cover
Output tray
Output tray
extension
USB port
Parallel port
Ink button
Paper button
Power button
Paper name* Size Part number
Epson Premium Bright White
Paper
Letter (8.5 x 11 inches) S041586
Epson DURABrite Ink Glossy
Photo Paper
Letter (8.5 x 11 inches) S041731
4 x 6 inches S041734
Epson Photo Quality Ink Jet
Paper
Letter (8.5 x 11 inches) S041062
A4 (8.3 x 11.7 inches) S041061
Legal (8.5 x 14 inches) S041067
Epson Glossy Photo Paper or
Epson Photo Paper
Letter (8.5 x 11 inches) S041141
S041649
S041271
S041272
A4 (8.3 x 11.7 inches) S041140
4 x 6 inches S041134
S041671
S041458
S041809
Epson Matte Paper
Heavyweight
Letter (8.5 x 11 inches) S041257
8 x 10 inches S041467
Epson Double-Sided Matte
Paper
Letter (8.5 x 11 inches) S041568
PremierArt Matte Scrapbook
Photo Paper for Epson
Letter (8.5 x 11 inches) SCR1002
Epson Premium Semigloss
Photo Paper
Letter (8.5 x 11 inches) S041331
Epson Ink Jet Transparencies Letter (8.5 x 11 inches) S041064
Epson Photo Quality Ink Jet
Cards
A6 (4.1 x 5.8 inches) S041054


