


38” MODEL 24750x50A & 40” MODEL 24755x50A MULCHER KITS
1
F–020904L
HOW TO INSTALL THE MULCHER PLATE
The mulcher plate and the mulcher blades are optional attach-
ments that can be added to the mower housing. The mulcher plate
lets you mulch the grass for a clean, fine cut. Install the mulcher
plate and the mulcher blades as follows.
WARNING: To prevent the engine from starting, dis-
connect the wire from the spark plug. Make sure the
blade rotation control is in the DISENGAGE position.
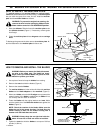
1. Raise the deflector. Slide the front of the mulcher plate under
the deflector bracket (Figure 1). If necessary, remove grass
from flange.
2. Fasten the mulcher plate with two wingnuts and two carriage
bolts.
To discharge the grass out the side, remove the mulcher plate. At-
tach the fasteners to the mulcher plate for future use.
Figure 1
Deflector
Mulcher Plate
Deflector Bracket
Remove grass
from flange.
Carriage Bolt
Wingnut
Wingnut
HOW TO REMOVE AND INSTALL THE BLADES
WARNING: Before you remove the blade, disconnect
the wire to the spark plug. The blade has sharp
edges. When you hold the blade, use gloves or cloth
material to protect your hands.
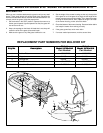
1. Use a piece of wood to keep the blades from rotating.
2. Remove the nuts that hold the blades (Figure 2).
3. Remove the standard blades.
4. Two mulcher blades are in the mulcher kit. Mount the mulcher
blades and the blade adapters on the mandrels (Figure 2).
5. Mount each blade so that the hi–lift edges are up (toward the
mower housing). If the blade is upside down, the blade will not
cut correctly and can cause an accident.
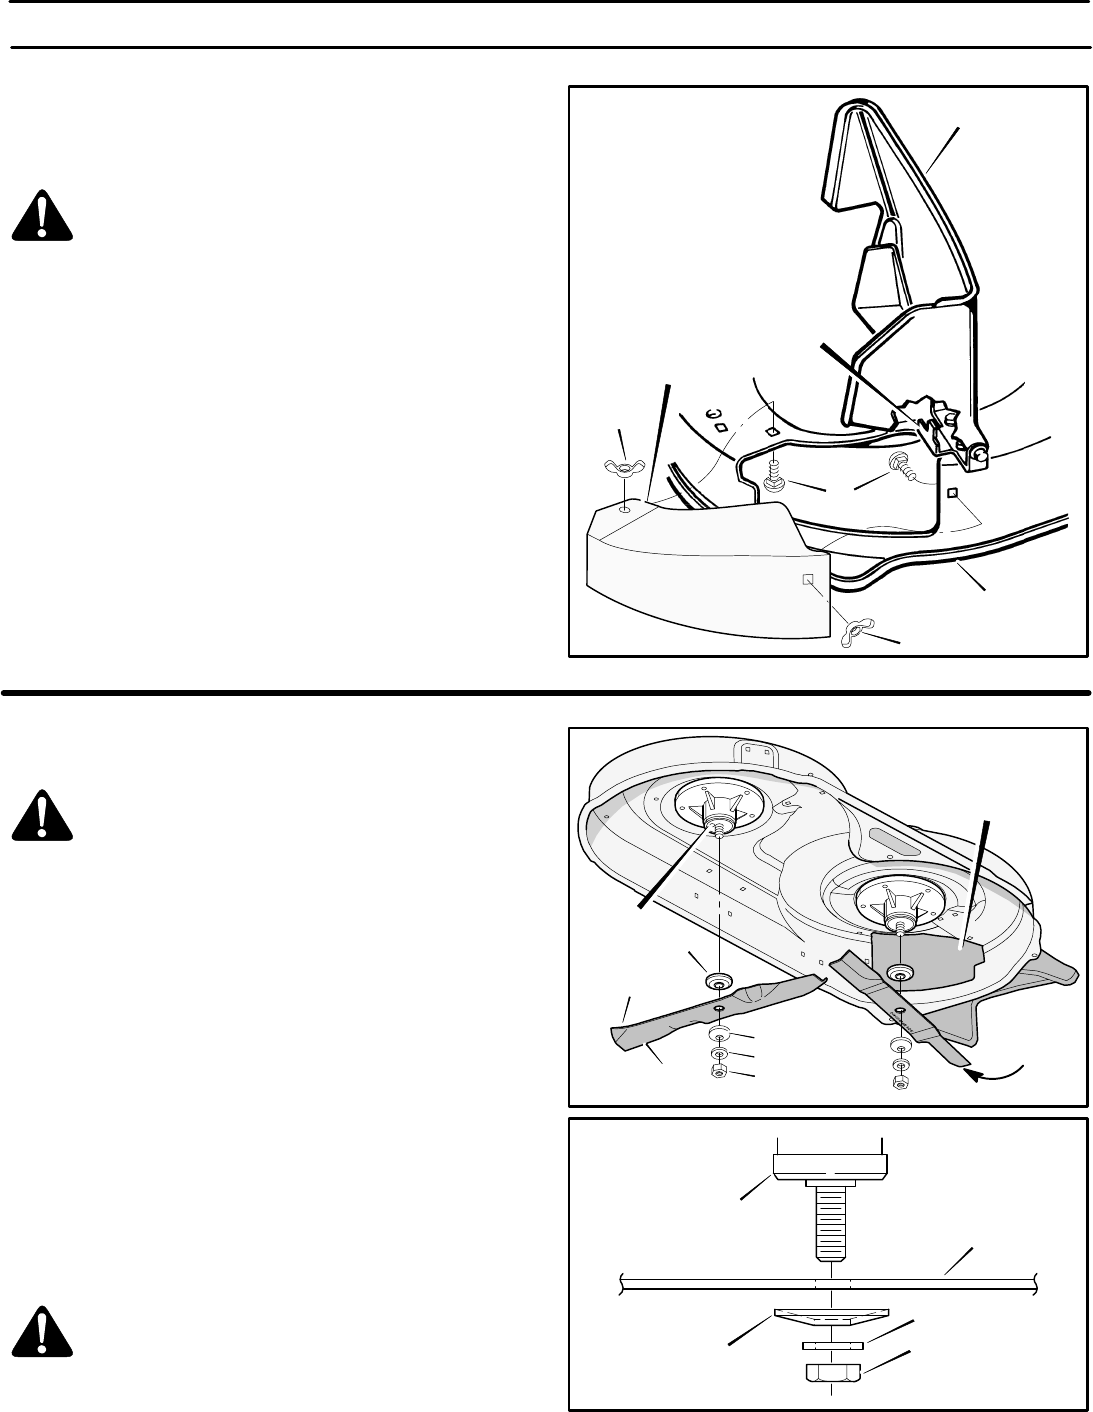
6. Fasten the blades with the original washers and nuts. Make
sure the outside rim of the Belleville washers are against the
blades (Figure 3).
NOTE: Check the rotation of the blades. Make sure the
blades do not hit the mower housing. If a blade hits, the
mower housing is bent. Hit the mower housing with a
hammer until the blade does not touch.
WARNING: Always keep the nut tight that holds the
blade. A loose nut or blade can cause an accident.
7. Tighten the nuts that hold the blades to a torque of 30 foot
pounds (41,5N–m).
Figure 2
Nut
Washer
Belleville Washer
Blade Adapter
Left
Mulcher Blade
Mulcher Plate
Mandrel
Hi–Lift Edge
Right
Mulcher Blade
Blade Adapter
Blade
Belleville Washer
(Outside rim must be
against the blade.)
Washer
Nut
Figure 3