AOC-USAS-L8i Add-on Card User’s Manual
6-16
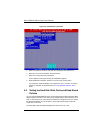
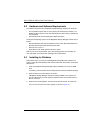
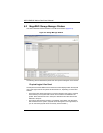
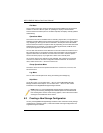
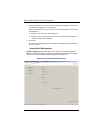
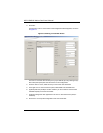
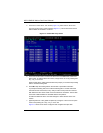
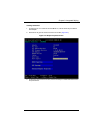
9. Click NEXT to continue with the next configuration step.
The VIRTUAL DISK SUMMARY screen appears.
10. Review the configuration shown in the screen. If you want to change something,
click B
ACK and change the configuration parameters.
11. Click FINISH to accept the configuration and start the initialization process (unless
you selected N
O INITIALIZATION earlier).
Using Manual Configuration: RAID 5
Follow these steps to create a RAID 5 storage configuration using the Manual
Configuration mode of the Configuration Wizard. You must buy the I-Button feature from
SuperMicro to enable RAID level 5 use.
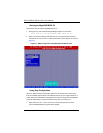
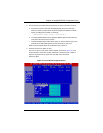
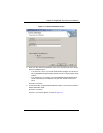
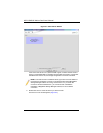
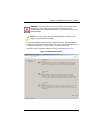
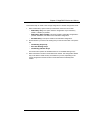
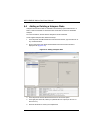
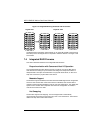
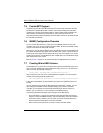
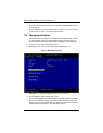
1. In the first M
ANUAL CONFIGURATION screen (Figure 6-8), select three available drives
in the left panel. Click the right arrow button to move the selected drives to the right
panel.
2. Click A
CCEPT to accept these drives for the new RAID 5 array.
3. Click N
EXT.
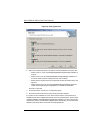
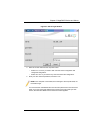
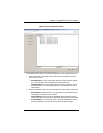
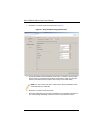
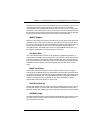
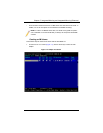
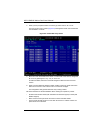
The next CONFIGURATION WIZARD screen appears (Figure 6-9). The ARRAYS menu
lists the new array that you just defined, plus any existing arrays with holes (free
space) that could be used for a new configuration.
4. From the A
RRAYS menu, select the array to use for the new virtual disk.
5. In the right panel, select RAID 5 as the RAID level.
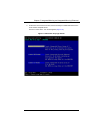
6. (Optional) Set S
IZE (in MB) to a lower number if you do not want to use the entire
available capacity for the new virtual disk.
7. (Optional) Change the other V
IRTUAL DISK PROPERTIES, if necessary.
8. Click ACCEPT to accept the configuration of the new virtual disk.
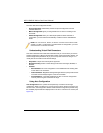
NOTE: MegaRAID Storage Manager software will not allow you to select the
disk drive on which the operating system is installed or any other drives that are
already part of a configuration.
NOTE: To remove a single drive from a proposed new array, select the drive
icon in the right panel and click the left arrow button.
NOTE: Click the RECLAIM button if you want to undo a virtual disk that you just
defined.