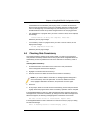
6-17
Chapter 6: MegaRAID Window and Menus
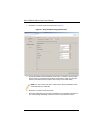
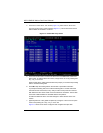
9. Click NEXT to continue with the next configuration step. The VIRTUAL DISK SUMMARY
screen appears.
10. Review the configuration shown in the V
IRTUAL DISK SUMMARY screen. If you want to
change something, click B
ACK and change the configuration parameters.
11. Click FINISH to accept the configuration and start the initialization process (unless
you selected N
O INITIALIZATION earlier).
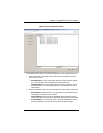
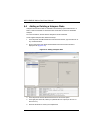
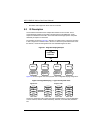
Using Manual Configuration: RAID 10
Follow these steps to create a RAID 10 storage configuration using the Manual
Configuration mode of the Configuration Wizard:
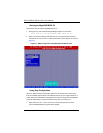
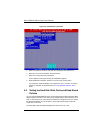
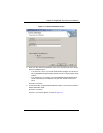
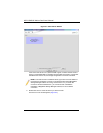
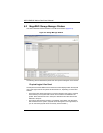
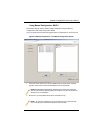
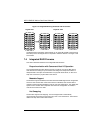
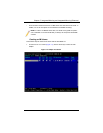
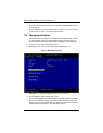
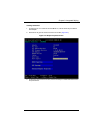
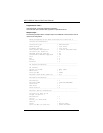
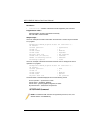
1. In the first M
ANUAL CONFIGURATION screen, shown in Figure 6-8, select two available
drives in the left panel. Click the right arrow button to move the selected drives to
the right panel.
2. Click A
CCEPT to accept these drives for a new RAID 1 array.
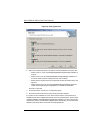
3. Select two more drives for a second RAID 1 array, and click A
CCEPT.
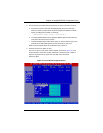
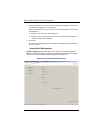
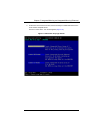
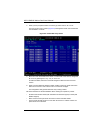
4. Click NEXT.
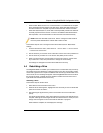
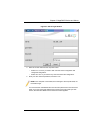
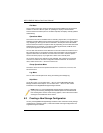
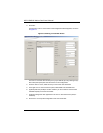
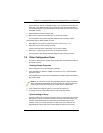
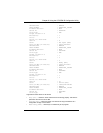
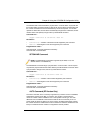
The next CONFIGURATION WIZARD screen appears, as shown in Figure 6-9. The
A
RRAYS menu lists the new arrays that you just defined, plus any existing arrays
with holes (free space) that could be used for a new configuration.
5. In the left panel, select the two RAID 1 arrays from the menu.
6. In the right panel, select RAID 10 as the RAID level.
For a RAID 10 array, the entire capacity of the array is automatically used for the
new virtual disk. You cannot define another virtual disk on this array.
7. (Optional) Change the other V
IRTUAL DISK PROPERTIES, if necessary. For more
information, see "Understanding Virtual Disk Parameters".
8. Click A
CCEPT to accept the configuration of the new virtual disk.
9. Click N
EXT to continue with the next configuration step. The VIRTUAL DISK SUMMARY
screen appears.
10. Review the configuration shown in the screen. If you want to change something,
click B
ACK and change the configuration parameters.
11. Click FINISH to accept the configuration and start the initialization process (unless
you selected N
O INITIALIZATION earlier).
NOTE: Click the RECLAIM button if you want to undo a virtual disk that you just
defined.